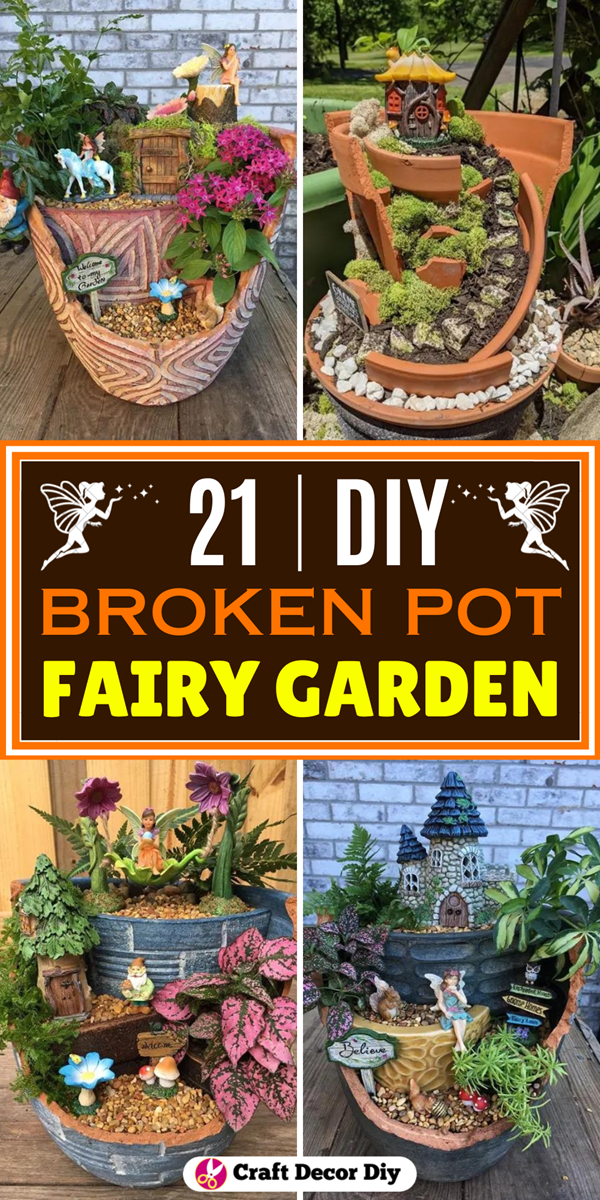
21 Adorable Broken Pot fairy Garden Ideas
Do you believe in fairies?
Then, you must have seen these adorable broken pot fairy gardens while scrolling through Pinterest.
You might be wondering how to make a broken pot fairy garden. A terracotta pot is pretty sturdy, so how do they break it perfectly to create those layers?
Well, in this post, I’m going to answer all those questions! Stay tuned.
Here you’ll also find a lot of creative ideas to decorate your broken clay pot garden.
Get ready to transform your damaged garden pots into a stunning fairy masterpiece.
How to Make a DIY Broken Pot Fairy Garden
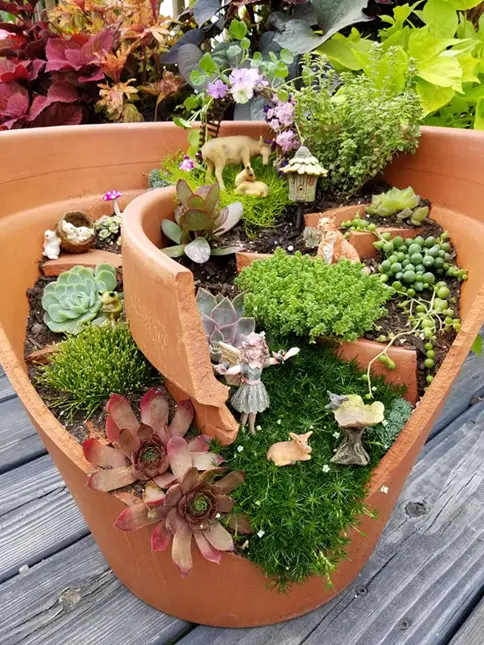
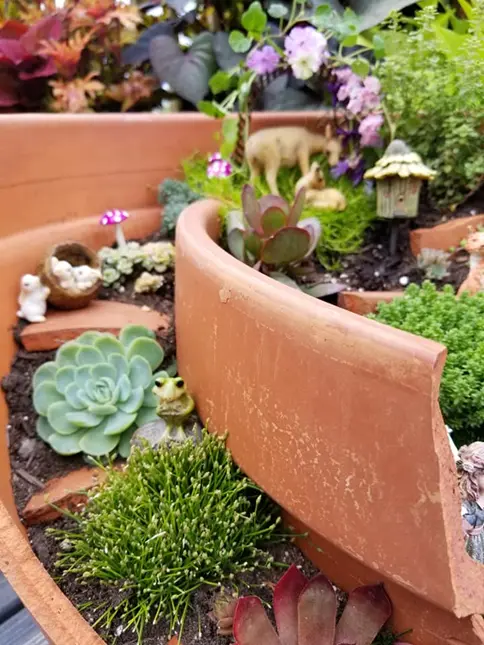
The idea is pretty simple: break one side of the clay pot in such a way that the base and other side remain intact.
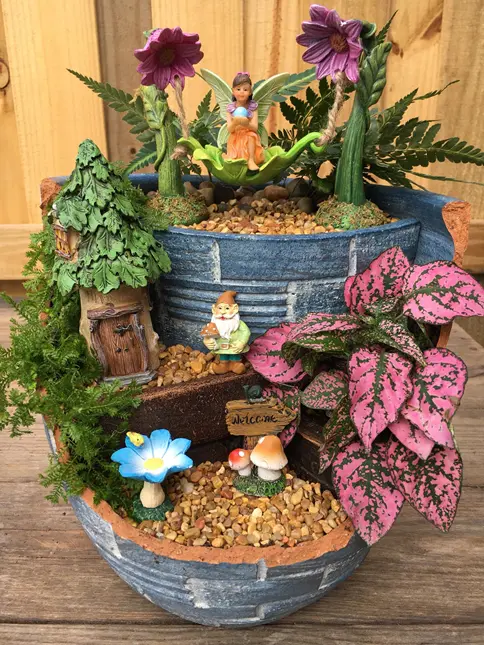
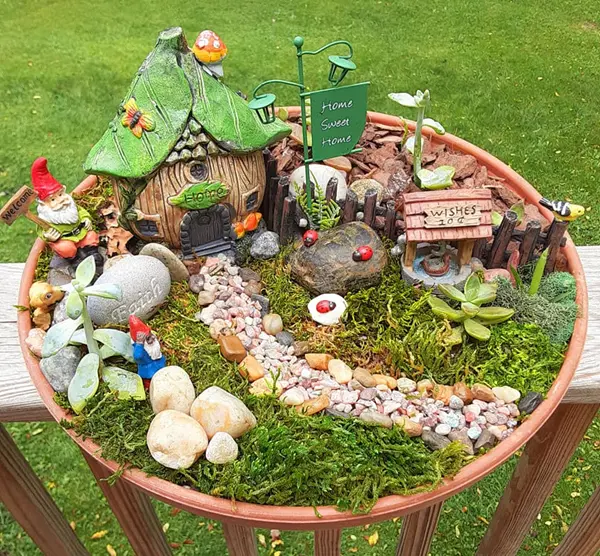
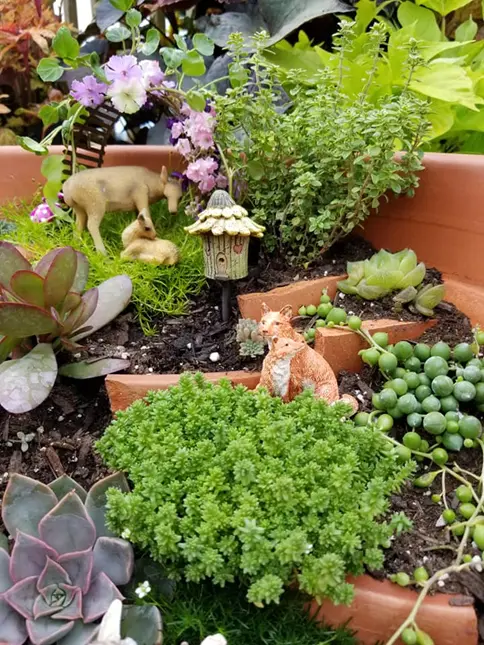
With the remaining broken parts, create layers, and fill the pot with soil. Then decorate it with a fairy house, succulents and tiny plants. Add, figurines of fairies and tiny animals
You can also incorporate cute accessories like mushrooms, miniature tables, chairs, signs, ladder, swing, and pathways.
Let’s cover it in detail!
But before we start:
Safety first: because the terracotta pots are sturdy, so we need to use a hammer to smash them.
Use safety glasses for protection from flying particles. Wear gloves while handling a broken pot because it has sharp edges.
What type of pot you need?
Though the name is “broken pot”, that doesn’t mean you can use any type of broken pot for this project. You need a terracotta pot that is broken in a specific way.
If you have that kind of broken planter, sure you can repurpose it. But to be very honest, in most cases, you have to destroy a perfectly good clay pot for this project.
The main idea is to break only one side of the clay pot in such a way that the base and other side remain intact so that it can easily hold the layer of soil.
Pot size:
If you have a bigger-sized terracotta pot, it’s better because you have more space to add items. A 14-inch or larger pot would be ideal for the project.
How to break the pot?
There are two ways. First, draw an outline on the clay pot with a pencil or marker; this will guide you on how much you need to break.
With a knife, make a marking over the drawn line. Now, with the help of a screwdriver and hammer, gently tap on the marking until it forms a small crack in the pot.
Once you get a small crack, keep tapping on the crack until it gets apart.
There is also another way, where you place a piece of a wood inside the pot near the brim and smash the outer part of the pot with the hammer. This will also give you the desired result.
You further need few small and big pieces of pots to create the layers and steps of the fairy garden. Use the hammer to create those pieces according to your choice.
Fill the pot:
Start filling the broken pot with the potting soil till the edge of the base. Leaving some space from the edge, and add a small piece of broken pot, keeping the curvy part outside,
and fill it will soil. This will create the first layer.
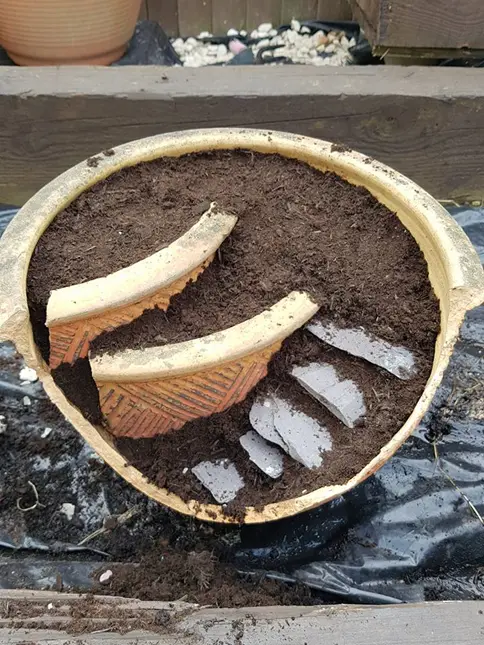
You can spray some water on the soil to keep it moist so it can hold on to the pot.
As you move upward, add large pieces of terracotta pot to create an upper layer, then fill it with soil.
Although two layers are enough for creating a broken pot fairy garden, you can create more layers based on how you like to do.
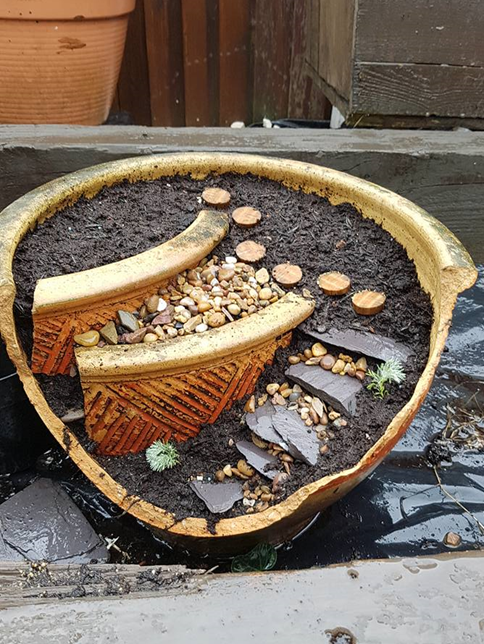
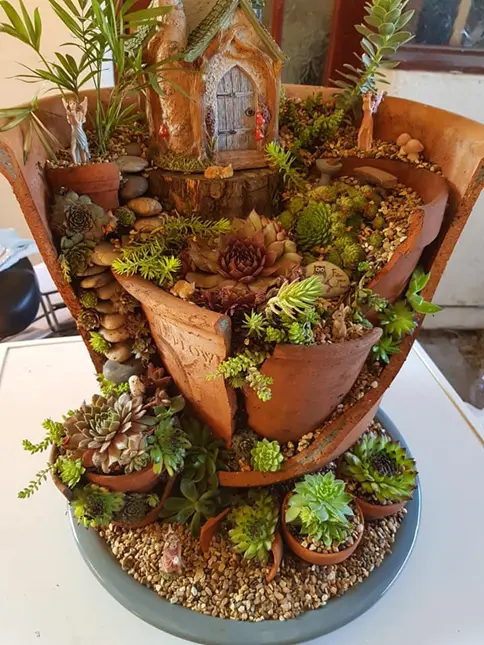
The key here is to select a large, curvy part of the broken pot for the top layer because it looks nice and gives ample space to fit a fairy house and plants at the top.
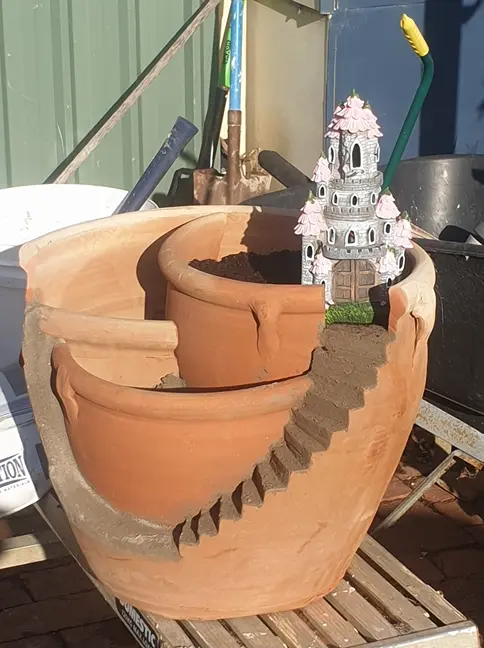
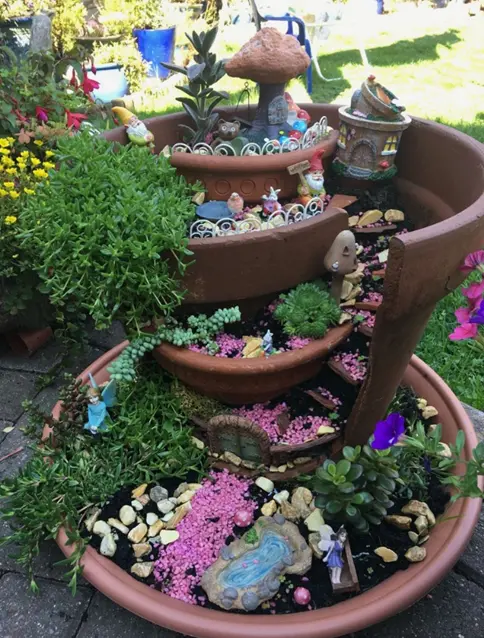
Another great idea would be to create steps on the side of the broken pot. For this, while creating layers, keep some space on one side of the pot so later on you can create steps.
Use some small broken parts or stones to create small steps along the side and add some soil to make it firm. Add some moss near the steps.
Decorating broken pot:
Now comes the fun part of decorating the fairy garden.
Supplies you need:
- Succulents
- Miniature plants with colorful leaves
- Artificial plants and flowers
- A small fairy house
- Tiny mushrooms
- Fairy furniture like a table, chair, or bench
- Pebbles and stones
- Welcome fairy garden sign
- Figurines of fairies, gnomes, and animals
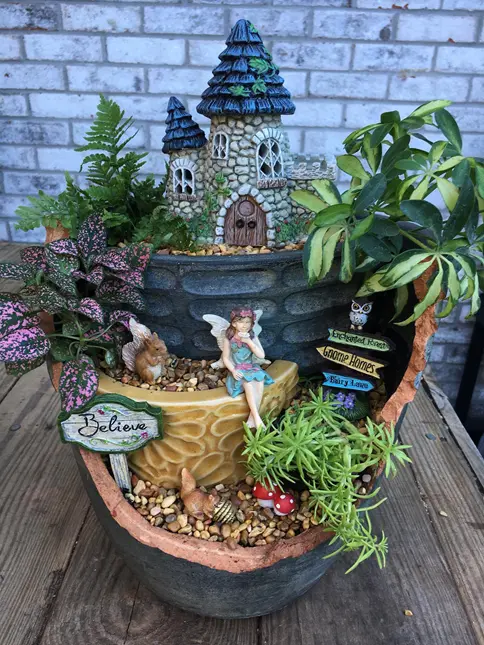
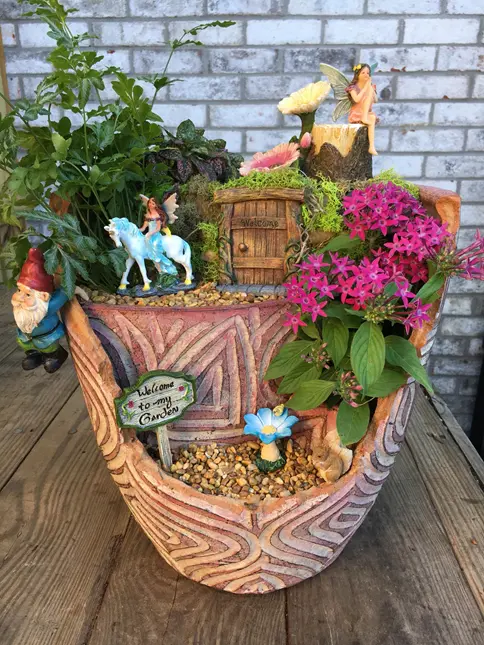
Decorating various layers of broken pot:
In the layers, add some succulents and colorful plants along with flowers. You can also use turtle vine plants on layers.
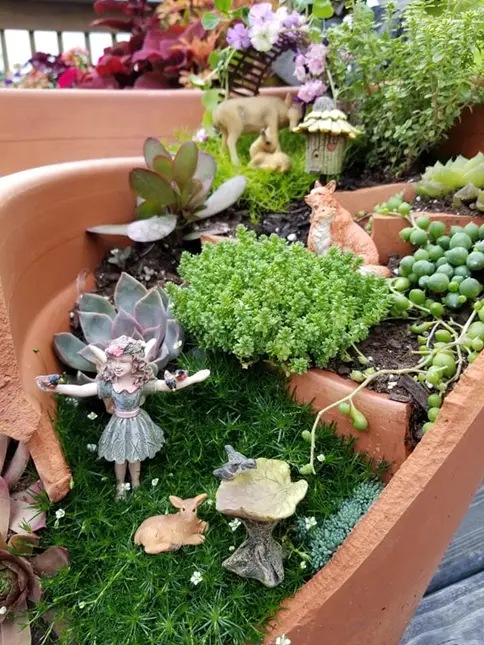
On the soil, add some pebbles and colorful rocks and place the fairies and animals. Use your imagination and incorporate accessories like table, chair, mushrooms, and fences.
On the top layer, install a small fairy house, and add succulents and plants around the house. Create a small pathway along the house entrance with pebbles.
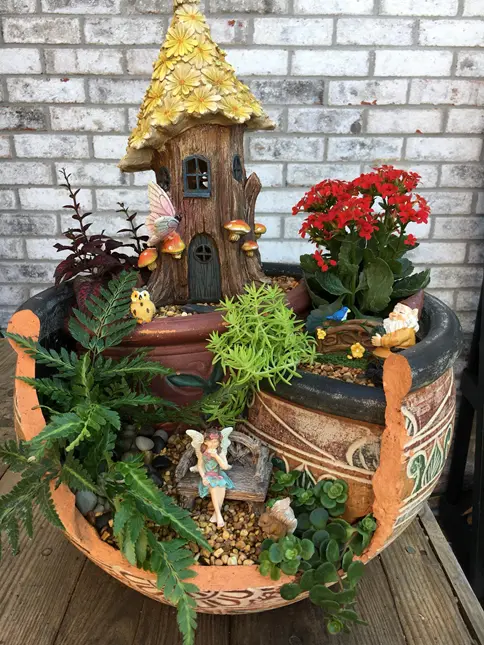
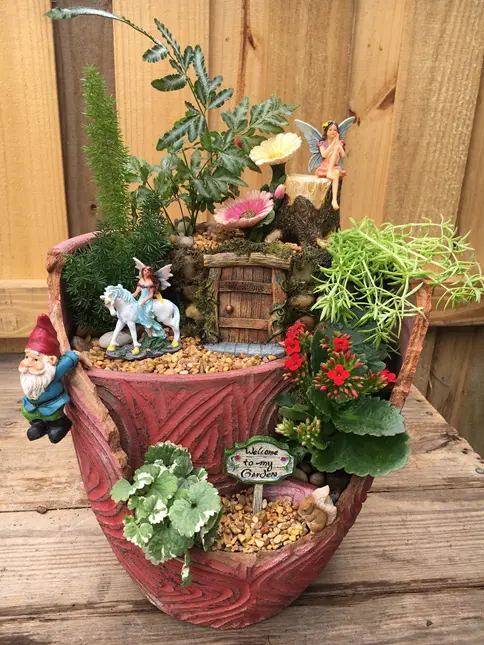
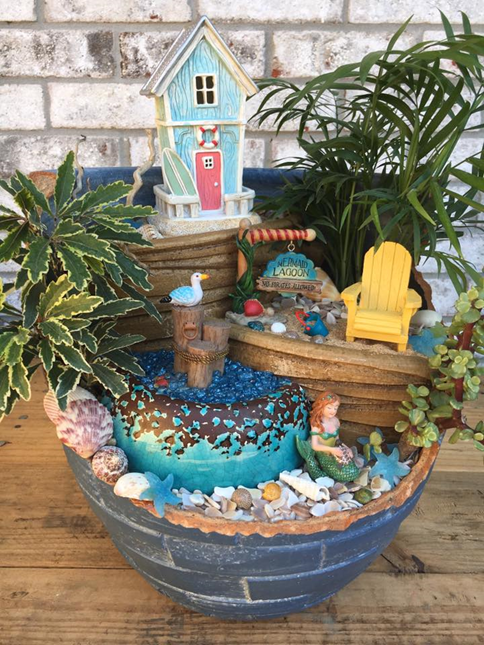
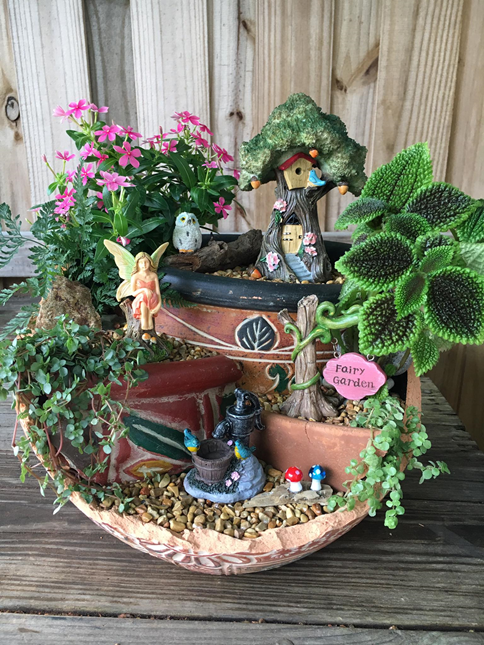
Broken pot fairy garden themes:
- Beach theme
- Enchanted forest
- Camping theme
- Farm theme
- Floral theme
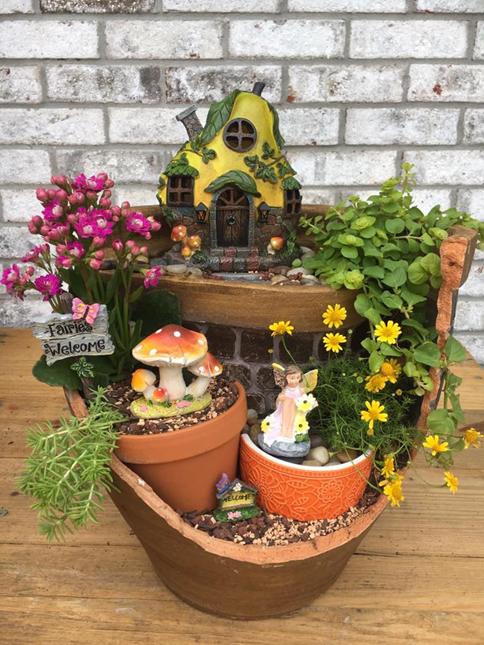
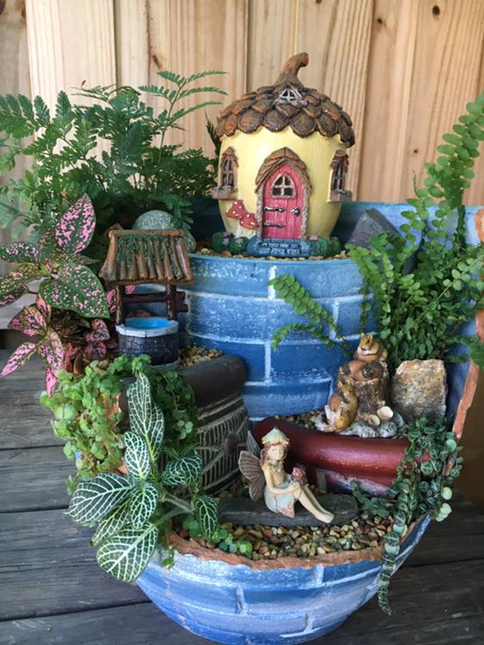
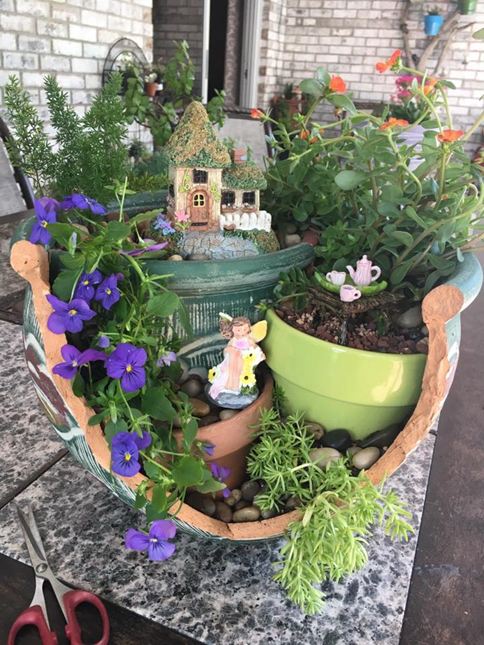
Get inspired by these images and create your broken pot fairy garden based on various themes.


What’s next?
If you enjoyed these beautiful ideas, please consider pinning the above images to your Fairy Garden board on Pinterest. It really helps me to reach more audiences.
Follow me on Pinterest